LEARN and CREATE – the « Climbing » bracelet Wednesday, 2 October 2019
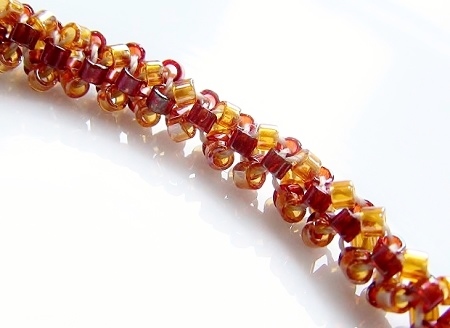
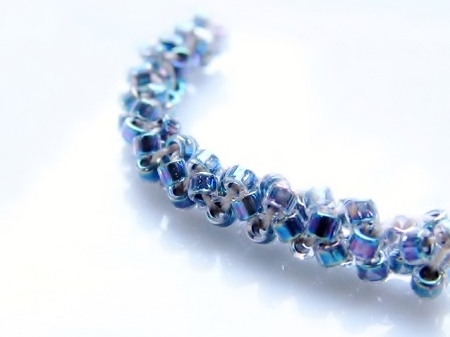
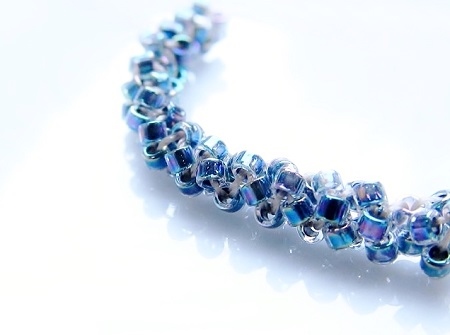
This cute slender little bracelet is made of floating climbing loops giving it its spring and suppleness. It can accommodate beaded beads or you can wear the “Climbing” bracelet by itself. It's a great beginner's project ... and as the little rope stays very light, why not make it your favorite necklace too.
Challenge:
The start may be a little tricky, but after a few rounds you will discover that it's actually an simple stitch. Once you understand the thread path, you will instinctively rotate your work and pay attention to the thread tension.
Supplies for the « Climbing » bracelet:
- 11/0 Japanese Delica beads in two contrasting colors: color A and color B or set A-B
- polyethylene thread (fishing line) for an invisible effect or S-lon thread in the color of your choice
- a small toggle clasp
- needle size 10 or 12, scissors and a bead mat
Weaving instructions for the « Climbing » bracelet:
- be aware that as the holes of the beads stay visible, so does your thread, as consequence take the color of your thread into consideration when you choose your beads
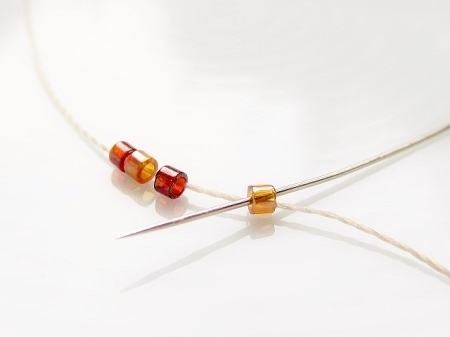
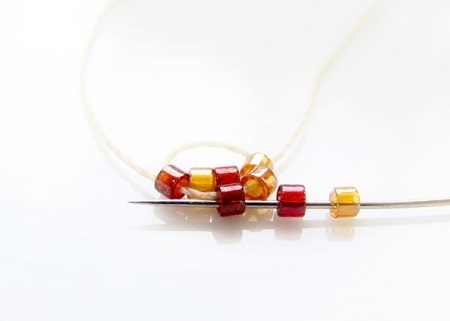
- cut off about 150 cm thread and leave about 25 cm tail thread to attach the second part of the toggle
- pick up 4 Delica's as follows: color A, color B, color A, color B
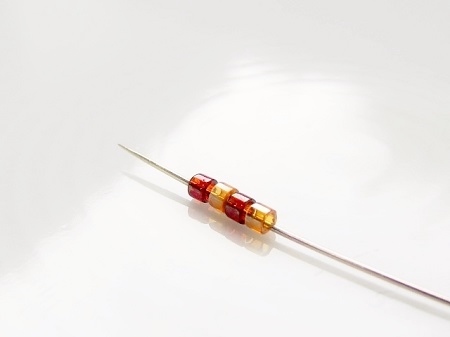
- go with your needle back through the 1st bead you picked up, which is a color A, to create a circle
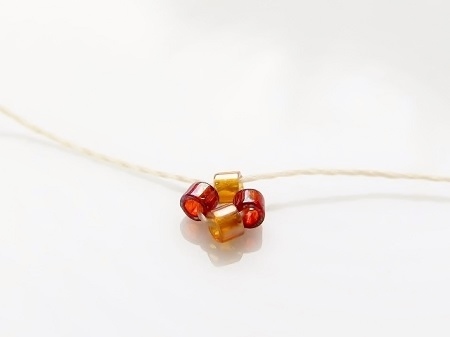
- pick up a Delica set A-B
- pass your needle through the previous bead in color B, which is the 4th bead or the last one you picked up before closing your circle
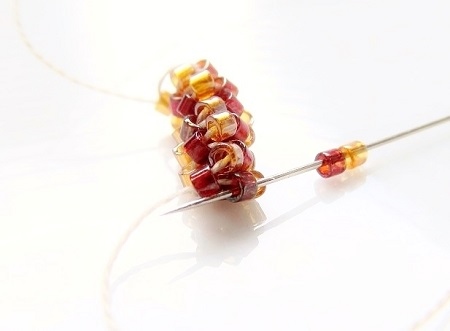
- you will find out that two colors B are almost set in a row (set B-B)
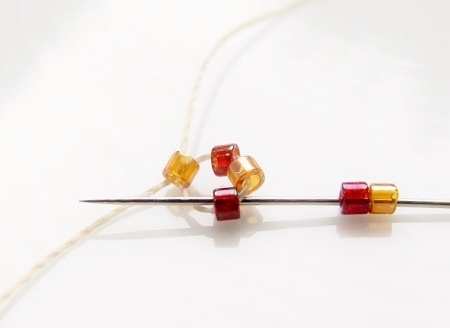
- to build up the rope and make a step-up fix your attention on the set B-B
- rotate the rope slightly so you get easy access to the next bead of the B-B set
- pick up a color set A-B and go through the 1st bead of the set B-B
- pull your thread tightly in order for the beads to shift in place
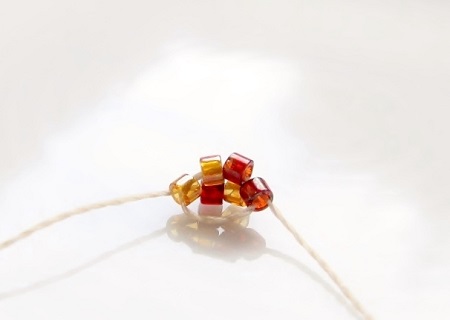
- rotate the rope slightly
- pick up a set A-B and go through the 1st bead of set B–B
- rotate the little rope slightly
- pick up a set A–B and go through the 1st bead of set B–B
- note: you will never attach a set A-B to a color A and as a consequence, color A will always stay floating
- continue till you have reached the desired length
SEE - part 2