LEARN and CREATE - a beaded bracelet in flat vertical netting - part 1 Wednesday, 31 August 2016
With the netting technique one creates a grid of diamonds, using, just like with lace, the negative space. The smaller the beads used, the more this technique makes your work resemble lace. The netting stitch may also form the basis for a richly decorated piece of work.
For flat netting one determines either the width or the length of the workpiece in advance. As a result, you work with a fixed data and a variable data.
This leads to two types of flat netting, namely:
- vertical netting: the width of the piece is fixed and the length varies
- horizontal netting: the length of the piece is fixed and the width varies
The visual difference between the two kinds of netting:
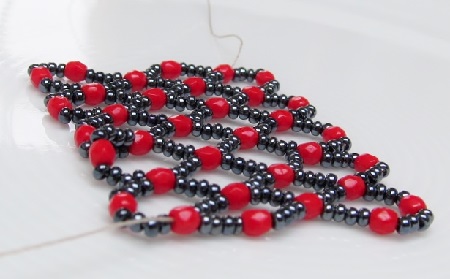
vertical netting:
- the opening of the crossover bead points vertically
- the long diagonal of the diamond shape sits vertically
Horizontal netting:
- the opening of the crossover bead points in horizontal direction
- the long diagonal of the diamond sits horizontally
Challenge:
- To gain understanding of the weave pattern of flat vertical netting and to learn to control the thread tension of it.
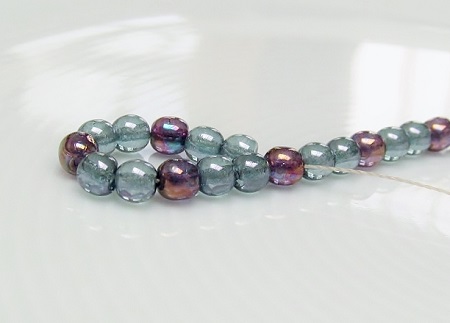
Supplies for the beaded bracelet in flat vertical netting:
- opt for two types of small beads or for two different colors
- for example, go for 3 mm beads or seed beads 8/0
- choose also a stopper bead in a different size or distinct color
- thread, needle and toggle
- scissors and beading surface
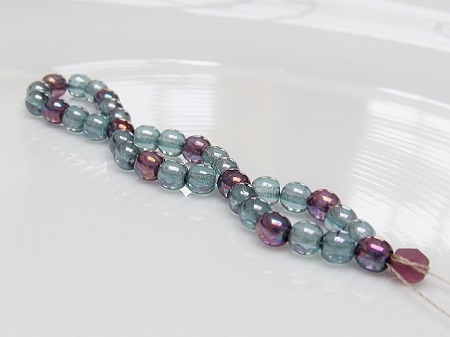
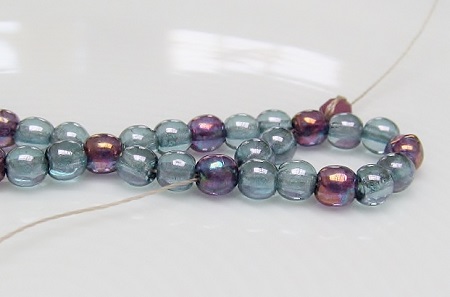
Weaving instructions for a bracelet in 5-bead netting:
- to keep it simple, you should choose a different color or bigger bead for the crossover bead
- for reasons of clarity, we have used 4 mm beads in the pictures hereafter
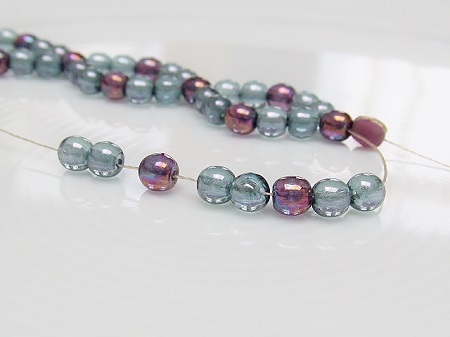
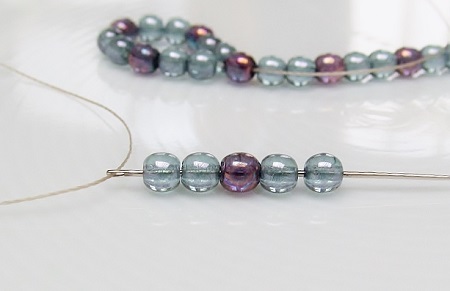
- cut of about 2 meters of thread and fix a stopper bead by going twice through it at 10-15 cm from the end
- pick up a crossover bead and two other beads and repeat this 8 times in total

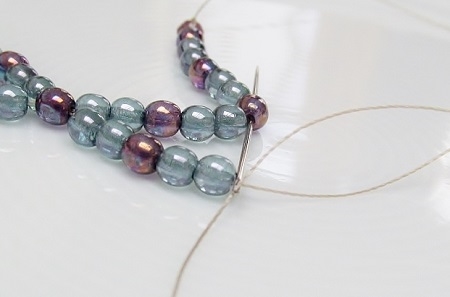
- make a U-turn and head back through the forth crossover bead
- herewith you have created the first diamond shape
- note that to make a U-turn, you need a turning bead and that each segment consists of two beads, a crossover bead and two beads
- if you do not make a U-turn, a segment is made of two beads, a crossover bead and two beads, hence its name 5-beaded netting
- *pick up a segment or 2 beads, a crossover bead and 2 beads
- skip a crossover bead and go through the next crossover bead**
- pull constantly on the thread in order to maintain the checker pattern
- repeat from * to **
SEE - part 2