


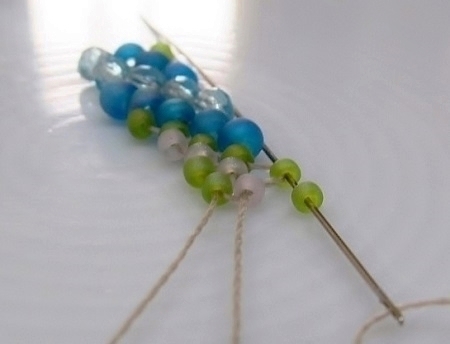
CONTINUATION: the flat Cellini
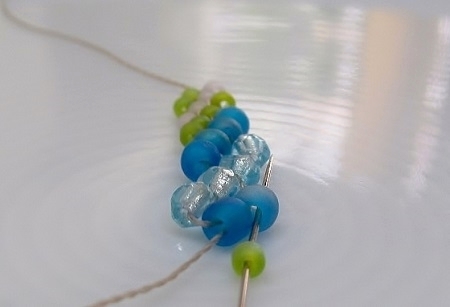
- persevere as once you have finished the first four rounds, it will become easier
- row four: continue regular peyote by adding to every second bead a bead in the same color as the one you want to go thru; for instance, you have to go thru a 11/0 B, you add a 11/0 B, you want to go thru a color A, you add a color A and so on
- in short, you make the opposite color choice when you work away from the tail than when you work towards the tail; you pick up a bead in the same color as the one you will go thru
**note, all even rows will be constructed in this way, to add a bead you look forwards to the color/size of the following bead**
- row five: you recommence the "small" diagonal color scheme from the start (aba) by skipping a 8/0 and adding one 11/0 A,
- to continue row five you add a bead in the same color as the one you just left; for example, you come out of a 8/0, you add a 8/0, coming out of a 3 mm, add 3 mm and so on
***all odd rows are built in this way, to add a color/size you look backwards to the bead you left***
- Do tighten your thread regularly as it will give you that curly shape you seek
- row six: you want to go thru a 11/0 A, add a 11/0 A and continue ** … **
- row seven: skip 11/0 A, add a new 11/0 B and continue *** … ***
- row eight: add a 8/0, continue ** … **
- row nine: add a 11/0 A (or the second a of the aba color scheme) … and … continue *** … ***
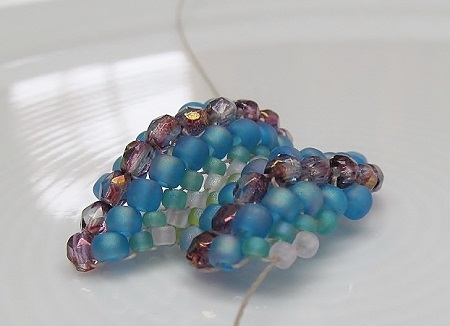
- while your bracelet takes shape, the scalloped texture will appear more and more
- finish by attaching a toggle clasp and enjoy your creation
Choose your beads and findings @ http://dunebeads.com/en/czech-fire-polished-round-beads !
Do not forget: practice makes perfect. Have fun, see you soon!